Getting Started with Java Pathfinder
Java Pathfinder (JPF in short) is a model checking tool for Java programs. Model checking is an approach to formal verification and can be used quite nicely to supplement traditional testing. Embedded in Academia has a nice blog post on that topic.
Since you are here, I’ll assume you already know what JPF does. If not: An introduction to JPF can be read on the JPF Wiki. If you do have some experience in software testing but have never heard about model checking and/or JPF I urge you to read the resources I linked to. Formal verification techniques can be a really nice addition to testing and JPF is a nice tool to have - especially since it is still under active development.
For the purpose of this short tutorial I’ll be using Ubuntu 16.04 and IntellJ Idea. There is a good tutorial for setting up JPF using Eclipse, so if you prefer Eclipse you might want to have a look at that.
Getting JPF
I recommend you download the JPF source and build it yourself (simply, you know, because that’s what worked for me). The only part of JPF you really need right now is jpf-core. Change to the directory where you want your JPF installation to reside (in my case ~/jpf) and download the source code using mercurial. Then move to the source directory and build jpf-core using Ant.
cd ~/jpf
hg clone http://babelfish.arc.nasa.gov/hg/jpf/jpf-core
cd ~/jpf/jpf-core
ant build
Configuring JPF
In order to use JPF you must create the site.properties file. This file basically tells JPF which modules it should load. More information can be found on the JPFWiki.
mkdir ~/.jpf
cd ~/.jpf && touch site.properties
The site.properties below is a minimal viable configuration file. Usually you would specify the path to extensions such as jpf-awt here, but that is not really of importance in the context of this tutorial.
# JPF site configuration
jpf.home = ${user.home}/jpf
jpf-core =  ${jpf.home}/jpf-core
Creating a JPF Project
There are a couple of ways to use JPF in your projects. You can
- run JPF from the command line.
- run JPF using JUnit.
- run JPF from another Java application.
I’ll show you how to verify a simple application, namely the Racer.java example from the JPF wiki using the command line. Using the other two approaches is only slightly more complicated.
Create a new Java Project. Create the file Racer.java and copy the following content into it.
public class Racer implements Runnable {
int d = 42;
public void run () {
doSomething(1001);
d = 0;
}
public static void main (String[] args){
Racer racer = new Racer();
Thread t = new Thread(racer);
t.start();
doSomething(1000);
int c = 420 / racer.d;
System.out.println(c);
}
static void doSomething (int n) {
try { Thread.sleep(n); } catch (InterruptedException ix) {}
}
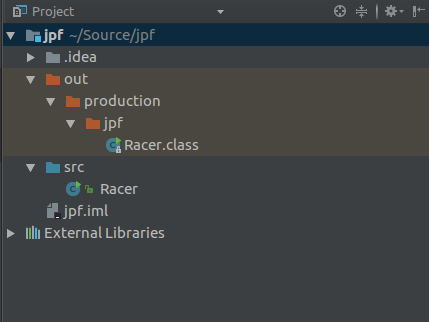
}If you are using IntelliJ Idea, your project should pretty much look like this now.
Open a terminal and navigate to your project folder. You should already be able to run JPF and detect a null pointer exception. Supplement ```jpf`` with whatever folder you chose for your JPF installation.
cd myproject
~/jpf/jpf-core/bin/jpf Racer
Add an additional .jpf file to specify additional properties for your system under test, in this case Racer.java. Say, you want to properly detect race conditions. You can do so by specifying a specialized listener for this specific SuT, namely PreciseRaceDetector. Create a file racer.jpf in your project root and add the following lines to it.
target=Racer
listener=gov.nasa.jpf.listener.PreciseRaceDetector
Run JPF again to get some more information about what is wrong with the SuT. You should be notified of the fact that there is a race condition involving the variable d. Big surprise, I know.
~/jpf/jpf-core/bin/jpf racer.jpf...
====================================================== error 1
gov.nasa.jpf.listener.PreciseRaceDetector
race for field [email protected]
main at Racer.main(Racer.java:35)
"int c = 420 / racer.d; // (4)" READ: getfield Racer.d
Thread-1 at Racer.run(Racer.java:26)
"d = 0; // (2)" WRITE: putfield Racer.dThere is tons more to be written about JPF, and since I feel existing documentation is lacking I hope I get around to it - soonish. I hope to write a more detailed tutorial about how you can bootstrap and verify your own applications. Good luck and happy playing around with JPF.